webxr-tutorial
A simple, brief WebXR tutorial.
Project maintained by beProsto Hosted on GitHub Pages — Theme by mattgraham
WebXR Initialization
In this article, after setting everything else up, we’re finally going to start doing WebXR.
We have to first know how our webxr game loop looks like:
- Init function - Creates a WebGL2 context, checks if starting a VR WebXR session is possible, and if it is, makes the button enabled.
- Button click event - When button is clicked, it should start a new WebXR VR session.
- Session start event - Specifies what happens when the VR session is started succesfully.
- Session on frame event - Does exactly what
window.requestAnimationFrame(onFrame)does, except for your VR display instead of the web browser’s window. - Session end event - Specifies what happens when the WebXR VR session is ended.
So, now you’re propably wondering, “What is this whole WebXR VR Session thing?”, well - here I come to explain it!
Well, WebXR Session is a WebXR object that tells us about our session - our gaming session per se.
The WebXR Session tells us if the device we’re using supports VR, if it can run a VR application and gives us an easy to use interface for running and managing these VR applications.
There are two types of WebXR Sessions:
immersive-vr- for VR applicationsimmersive-ar- for AR applications
Of course, because of this tutorial’s topic, we’re going to concentrate only on immersive-vr session.
So now, that we’ve gone over this, let’s get to coding.
First of all, we’re gonna have to add another init function - it’s name will be initWebXR. Then, in that same function, we’re going to check if our device supports WebXR, and if it does - we’re gonna check if immersive-vr session is supported, if it is - we’re gonna make our button enabled, and able to do something, but we’re not gonna tell it what to do just yet.
// XR globals.
let xrButton = document.getElementById("xr-button");
let xrSession = null;
let xrRefSpace = null;

function initWebXR() { // our new init function
	if(navigator.xr) { // checks if our device supports WebXR
		navigator.xr.isSessionSupported("immersive-vr").then((supported) => { // we check if immersive-vr session is supported
			if(supported) { // if it is supported
				xrButton.disabled = false; // enable the button (makes it possible to click it)
				xrButton.textContent = "Enter VR"; // change text on the button
				xrButton.addEventListener("click", onButtonClicked); // add a new event to the button, which will run the onButtonClicked function
			}
		});
	}
}
Now, if you got a little confused over this code, take a little bit of time to analyse it, step by step.
Moving on, our button will play a big role in this application, it’s job is to start it and (sometimes) end it. Without our button, how would we start our application in an intuitive way? Exactly - we wouldn’t. (Not to say that it wouldn’t be impossible, just most of the other ways of doing it are simply unpleasant.)
So let’s make a function that will handle what happens when our button is pressed:
function onButtonClicked() { // this function specifies what our button will do when clicked
	if(!xrSession) { // if our session is null - if it wasn't created
		navigator.xr.requestSession("immersive-vr").then(onSessionStarted); // request it (start the session), and when the request is handled, call onSessionStarted
	} else { // if our session was started already
		xrSession.end(); // request our session to end
	}
}
Now we have to define what happens when our session ends, and what happens when it starts.
But first, we have to modify our initWebGL2 function a little tiny bit:
function initWebGL2(attributes) {
	canvas = document.createElement("canvas"); // creates a new canvas element ( <canvas></canvas> )
	gl = canvas.getContext("webgl2", attributes || {alpha: false}); // creates a WebGL2 context using the canvas and the given attributes, with an addition of {alpha: false} attribute, which just disables transparency of our canvas
	if(!gl) { // if the gl DIDN'T create properly
		alert("This browser does not support WebGL 2."); // alert the user about it
		return; // go out of the function; stop this function
	}
	canvas.style = "position: absolute; width: 100%; height: 100%; left: 0; top: 0; right: 0; bottom: 0; margin: 0; z-index: -1;"; // we add a simple style to our canvas
	document.body.appendChild(canvas); // appends/adds the canvas element to the document's body
	onResize(); // resizes the canvas (it needs to be done, because otherwise it will not resize until you resize your window)
}
And now, after modifying our initWebGL2 function this way, we can finally initialize it along with our whole WebXR application:
function onSessionStarted(_session) { // this function defines what happens when the session is started
	xrSession = _session; // we set our session to be the session our request created
	xrSession.addEventListener("end", onSessionEnded); // we set what happenes when our session is ended

	initWebGL2({xrCompatible: true}); // we initialize WebGL2, in a way that makes it compatible with WebXR

	xrSession.updateRenderState({baseLayer: new XRWebGLLayer(xrSession, gl)}); // this line simply sets our session's WebGL context to our WebGL2 context
	xrSession.requestReferenceSpace("local").then((refSpace) => { // we request our referance space - an object that defines where the center of our space lies. Here we request a local referance space - that one defines the center of the world to be where player's head is at the start of our application.
		xrRefSpace = refSpace; // we set our referance space to be the one returned by this function
		xrSession.requestAnimationFrame(onSessionFrame); // at this point everything has been set up, so we can finally request an animation frame, on a function with the name of onSessionFrame
	});

	function onSessionFrame(t, frame) { // this function will happen every frame
		const session = frame.session; // frame is a frame handling object - it's used to get frame sessions, frame WebGL layers and some more things
		session.requestAnimationFrame(onSessionFrame); // we simply set our animation frame function to be this function again
	}

	function onSessionEnded() { // this function defines what happens when the session has ended
		xrSession = null; // we set our xrSession to be null, so that our button will be able to reinitialize it when we click it the next time
	}
}
We can also request a couple more types of referance spaces, here’s a simple, nice list of them.
As you can see, it’s pretty easy to setup an easy WebXR application. Now, I would like to bring your attention a little bit more to the onSessionFrame function. For it to work properly in the future, we have to set it up properly now:
function onSessionFrame(t, frame) { // this function will happen every frame
	const session = frame.session; // frame is a frame handling object - it's used to get frame sessions, frame WebGL layers and some more things
	session.requestAnimationFrame(onSessionFrame); // we simply set our animation frame function to be this function again
	let pose = frame.getViewerPose(xrRefSpace); // gets the pose of the headset, relative to the previously gotten referance space

	if(pose) { // if the pose was possible to get (if the headset responds)
		let glLayer = session.renderState.baseLayer; // get the WebGL layer (it contains some important information we need)

		gl.bindFramebuffer(gl.FRAMEBUFFER, glLayer.framebuffer); // sets the framebuffer (drawing target of WebGL) to be our WebXR display's framebuffer
		gl.clearColor(0.4, 0.7, 0.9, 1.0);
		gl.clear(gl.COLOR_BUFFER_BIT | gl.DEPTH_BUFFER_BIT); // clears the framebuffer (in the next episode we'll implement our ezgfx renderer here - for now, let's just use vanilla WebGL2, as we're not doing anything else than clearing the screen)
		for(let view of pose.views) { // we go through every single view out of our camera's views
			let viewport = glLayer.getViewport(view); // we get the viewport of our view (the place on the screen where things will be drawn)
			gl.viewport(viewport.x, viewport.y, viewport.width, viewport.height); // we set our viewport appropriately

			// Here we will draw our scenes
		}
	}
}
And at the end of our file, we have to change the call to initWebGL2 to be a call to initWebXR:
initWebXR(); // we call our init function, therefore initializing the application
Now, if you did everything correctly, you may still face an issue of the application not working. If your button still says VR not found, even tho you are on the device that supports VR (a PC with the headset connected, a mobile phone, an oculus quest, anything), it means that your device doesn’t support WebXR. We can fix it fairly easily, simply by implementing the WebXR Polyfill. It’s fortunately easy to use, you just do this at the start of your file (index.js of course):
// Polyfill makes it possible to run WebXR on devices that support only WebVR.
import WebXRPolyfill from "https://cdn.jsdelivr.net/npm/webxr-polyfill@latest/build/webxr-polyfill.module.js";
const polyfill = new WebXRPolyfill();
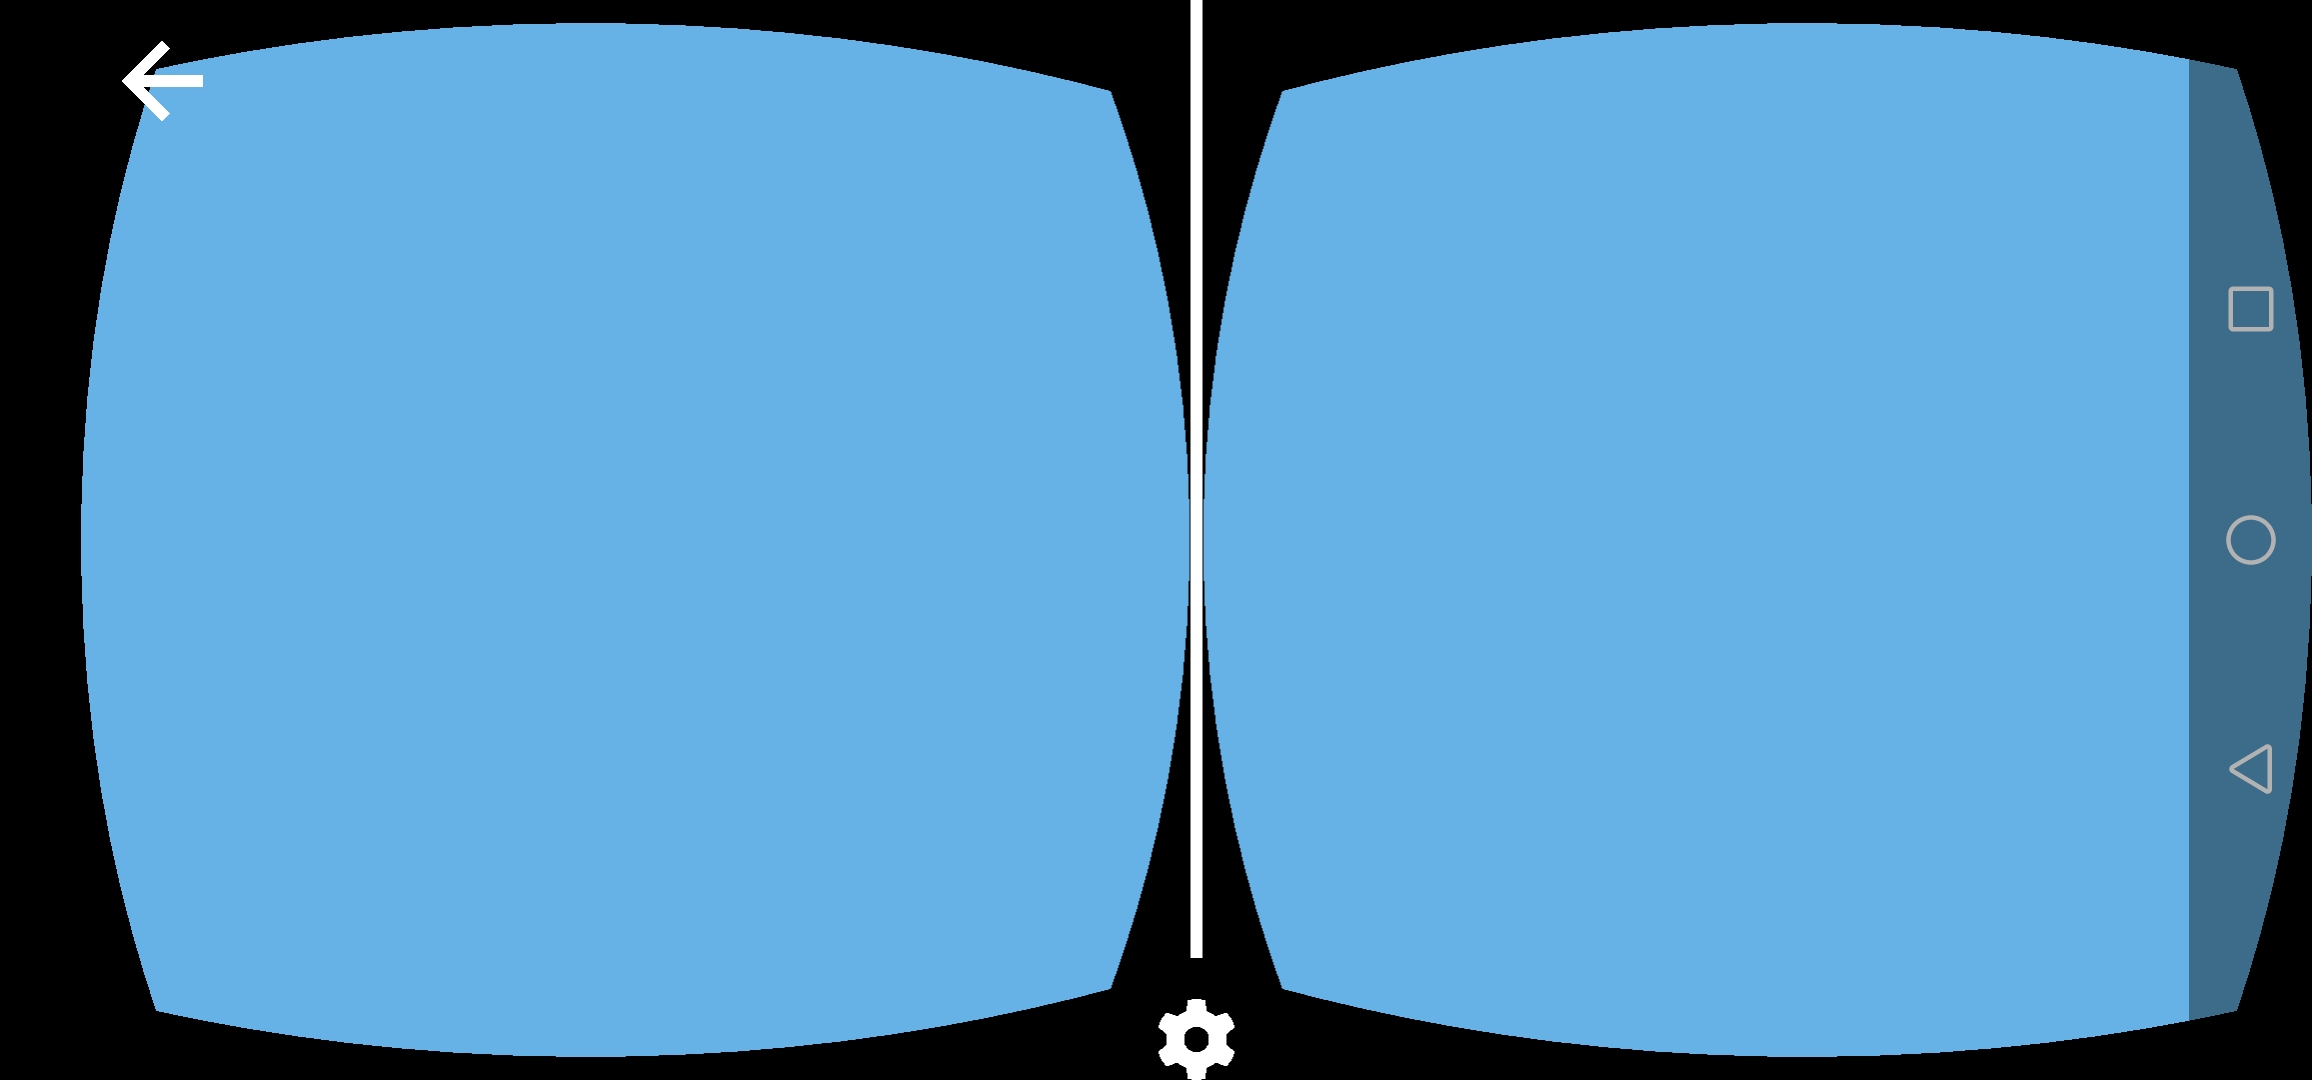
If everything worked correctly, you should see this on your phone after clicking on the Enter VR button (if it didn’t work out, go ahead and check out the project’s files directly):
You can check out the project’s files here!
Next: A simple 3D WebXR scene Previous: A simple WebGL 2 abstraction
Comments
Join the discussion for this article on this ticket.